Wednesday, July 27, 2011

Image found here.
We have a skunk living under the shed in our yard. I am not kidding. We discovered it just now when we pulled in the driveway and saw it strutting around the yard. As we parked the car it walked behind the shed. Then, it peeked around the shed to see if we were watching, decided we weren't, and sauntered under the shed. Fantastic. I'm not sure what I'm going to do about it. Suggestions?

Laundry Room Makeover

We've been without a washer and dryer for weeks!! Our shiny new Fisher & Paykel washer and dryer arrived on Saturday. Well, our washer arrived along with a loaner dryer since ours got busted up in transit. But I'm not complaining. It'll all get sorted out sooner or later, and in the meantime we can still do our laundry, haha! The laundry room needed a good cleaning and a fresh coat of paint before we moved in the washer and dryer.

Here's what it looked like originally. An icky dirty little room with a flimsy wooden shelf.
The first step was to remove the shelf. And guess what? They had painted around it at some point. The paneling showing through meant the room needed an extra coat of primer to cover the dark spots.
I painted the room with an "oops" can of warm grey paint that my Mom got at Lowes for free. I'm very happy with the color, and you can't beat free!
The last step was to add a new wire shelf for storage. Here's the final result! Neat and clean and new. I'm thinking of adding a second shelf above the one you see here, but I haven't gotten to it just yet.
So far, all of the good things that I've heard about Fisher & Paykel are true. They're quiet, the settings are awesome, and the dryer is a top loader so it's easy to transfer laundry from the washer to the dryer in one motion.
Have you taken on any renovation projects lately?

Monday, July 25, 2011

Master Bedroom - Progress?

I'm in the phase of opening boxes and seeing what I have that I can reuse in our new house. Since we got our bedroom painted first, that's the room I'm focusing on setting up. I hesitate to post these pictures because the room's so far from being done! This is my version of "throw everything that you've unpacked in there and see what happens before you decide what else to buy." Haha.

So far, we've knocked out the following:
  • Refinished the hardwood floors ebony. We love it!
  • Repainted the walls Benjamin Moore Kendall Charcoal.
  • Repainted the ceiling Benjamin Moore Decorator's White.
  • Hung temporary roller shades on the windows, so we don't become the talk of the neighborhood.
  • New duvet and shams from Ikea. Thanks to my Mom for bringing them from Dallas! We really need an Ikea in Nashville.
  • New-to-me desk that I'm using as the bedside table on the left, given to me by Mema G and Pepa B. 
We still have a lot to knock out:
  • Install new baseboards, and get them painted.
  • Paint the peeling door and window casings.
  • Replace the ugly ceiling fan with a pretty new shade fixture. (It's ordered, I can't wait for it to come in!)
  • Lay a seagrass rug on the floor. (It's ordered, too!)
  • Hang new curtain panels on a ceiling track on three walls.
  • Refinish the desk on the left of the bed and dress it up with new hardware.
  • Replace my old red lampshade with a new greige linen shade.
  • Repaint an old chest of drawers that my Mother and Father-in-law are giving to us and locate it to the left of the closet door.
  • Hang new artwork.
  • Accessorize.
This is our gifted desk. It just needs a little facelift.
The picture above is where our chest of drawers will go.
And this picture shows the great wall where I'll feature artwork.


Friday, July 22, 2011

Book Review - Bossypants

All of the time I've spent on airplanes the last couple of weeks has given me something I'd been missing: time to read! On my last trip I made an immediate beeline into the airport bookstore to buy Bossypants by Tina Fey. I was NOT disappointed. She is hilarious and quick and clever. The best thing was how quick of a read it is. I finished it in two flights. I also laughed out loud multiple times on a airplane, to the point that the guy beside me looked at me like I was crazy. Totally worth it.

Tuesday, July 19, 2011

Hardwood Floors, and Registers to Match

My Mom is the queen of spray paint. She always thinks of great ways to use it to make projects easier. It was her idea to use oil-rubbed bronze spray paint to transform our ugly rusty brass register covers. Unfortunately, in the rush to get lots of stuff done in a short amount of time, I don't have a "before" picture to show you. But you can see in the "after" pictures how well the old register covers blend into our ebony floors. This is a super easy fix that anyone can do in an hour.
Man, these pictures will look a whole lot better when I get the new baseboards in!


Monday, July 18, 2011

Our Biggest Project Ever - Hardwood Floors

Our house has good bones. One of them is the hardwood floors. Unfortunately when we bought the house they were covered with nasty blotchy stains and weird dark discoloration around all of the baseboards. Not pretty. You can see some of the problems in these pictures.
The first step of the process was to remove all of the doors and then rip off the existing baseboards. Check out that discoloration! Gross.
Next, we rented a drum sander and an edge sander and got to work. It took some adjustment to get used to the sanders, but eventually we got into the swing of things.
You can see some of the stains in this picture.
And then...we stained the floors ebony! My reason for picking such a dark color was two-fold. The first reason was to hide the ugly stains in the wood. And the second was just because I've always wanted dark wood floors!
Here's how it looks with one coat of stain.
And here's coat #2. It was significantly darker than the first coat. I was thrilled!
And then after a big struggle with polyurethane (this was by far the most difficult part of the process) we ended up with this.
It's far from perfect, but it's pretty darn good for our first attempt! Now, once we finish painting the walls we'll install some new updated baseboards.

Tuesday, July 12, 2011

What a Difference a Day Makes: Part 2

The second project I tackled with my family was painting our Master Bedroom. We had already removed all of the baseboards in order to refinish the floors. (More on that project later!)

Here's the Master Bedroom before:

Step 1: Remove the old dirty curtain hardware left behind by the previous owners.

Step 2: Paint the ceiling Benjamin Moore Decorator's White.

Step 3: Filled all of the existing holes in the walls and sand even once dry. Spot prime any questionable stains and spots.

Step 4: Paint! I chose Benjamin Moore Kendall Charcoal. (It was meant to be.) It's the paint chip on the bottom right.

Next step: repaint the door and window casings. Someone mixed oil and latex paint the last time around so they currently look like this. But we'll fix it!


Sunday, July 10, 2011

What a Difference a Day Makes: Part 1

Now that I've given you the house tour, I can start to show you the progress we've made! My awesome family came to Nashville for a day last weekend to help Kane and I kick-start the whole process. Thanks Mom, Mema Gail and Pepa Bob, Aunt Karen and Hamilton!

One of the most dramatic things we accomplished was stripping the wallpaper in the Kitchen. Here's the paper "Before."
This paper came off very easily as far as wallpaper goes. We scored the paper, sprayed liberally with Chomp, then peeled it right off! We were very lucky that our 50s house only had one layer of paper. 
There's H helping peel it off!
And Mema Gail!
Here's the finished result. The difference is like night and day. We still need to caulk, prime and paint the walls, but for now I'm just happy to have the flowers gone!

Lastly, you may be wondering what "Chomp" is. Trust me when I say that it is the most amazing product for removing wallpaper. I'm not getting anything for endorsing this stuff, it's just so great that I want all of you to know about it for the next time you have to remove wallpaper!


Friday, July 8, 2011

The House Tour!

I'm back today from a quick work trip to San Francisco. It's good to be home for a few days before I head to Baton Rouge next week. I'm barely spending any time in this new place of ours! Without any further ado, here's the much-anticipated house tour! Consider these the "befores."

The view from the street. The house is on a great corner lot and the landscaping is really mature. It all needs a good trimming, and the house needs some washing...but other than that we're going to leave it be for the time being.
Our back deck. It's roomy with plenty of space for our new grill and lots of chairs! We had 14 people over the weekend we moved in and there was more than enough room on the deck for everyone.

When you walk in through the front door you're in the formal Living Room/Dining Room. It's a generous room for a 50s ranch. Long and narrow with two great windows!
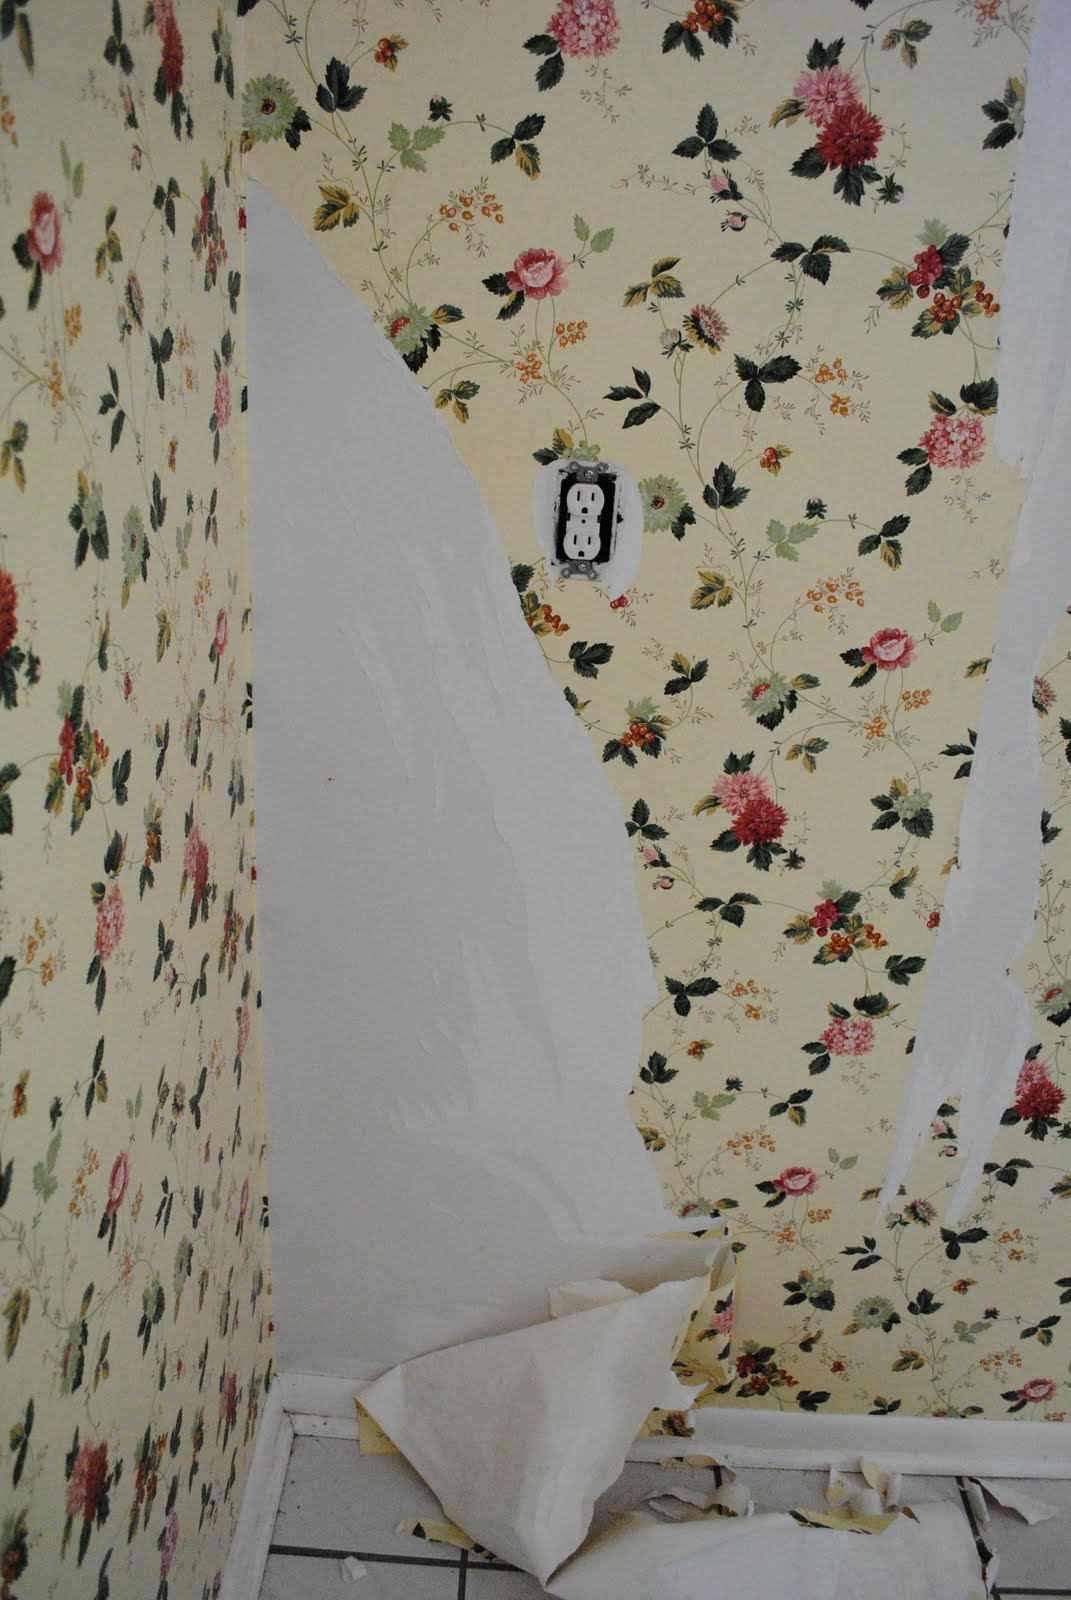
Here's our sweet little Kitchen. Check out the awesome floral wallpaper! (In case you didn't catch the sarcasm through the type, it was there.)
This gives you a better idea of the wallpaper expanse.
The Den is the only carpeted room in the house. We're planning on using it as our TV room.
Check out the teeny tiny half bath off the Den. It's the actual size of a phone booth, which is pretty funny!
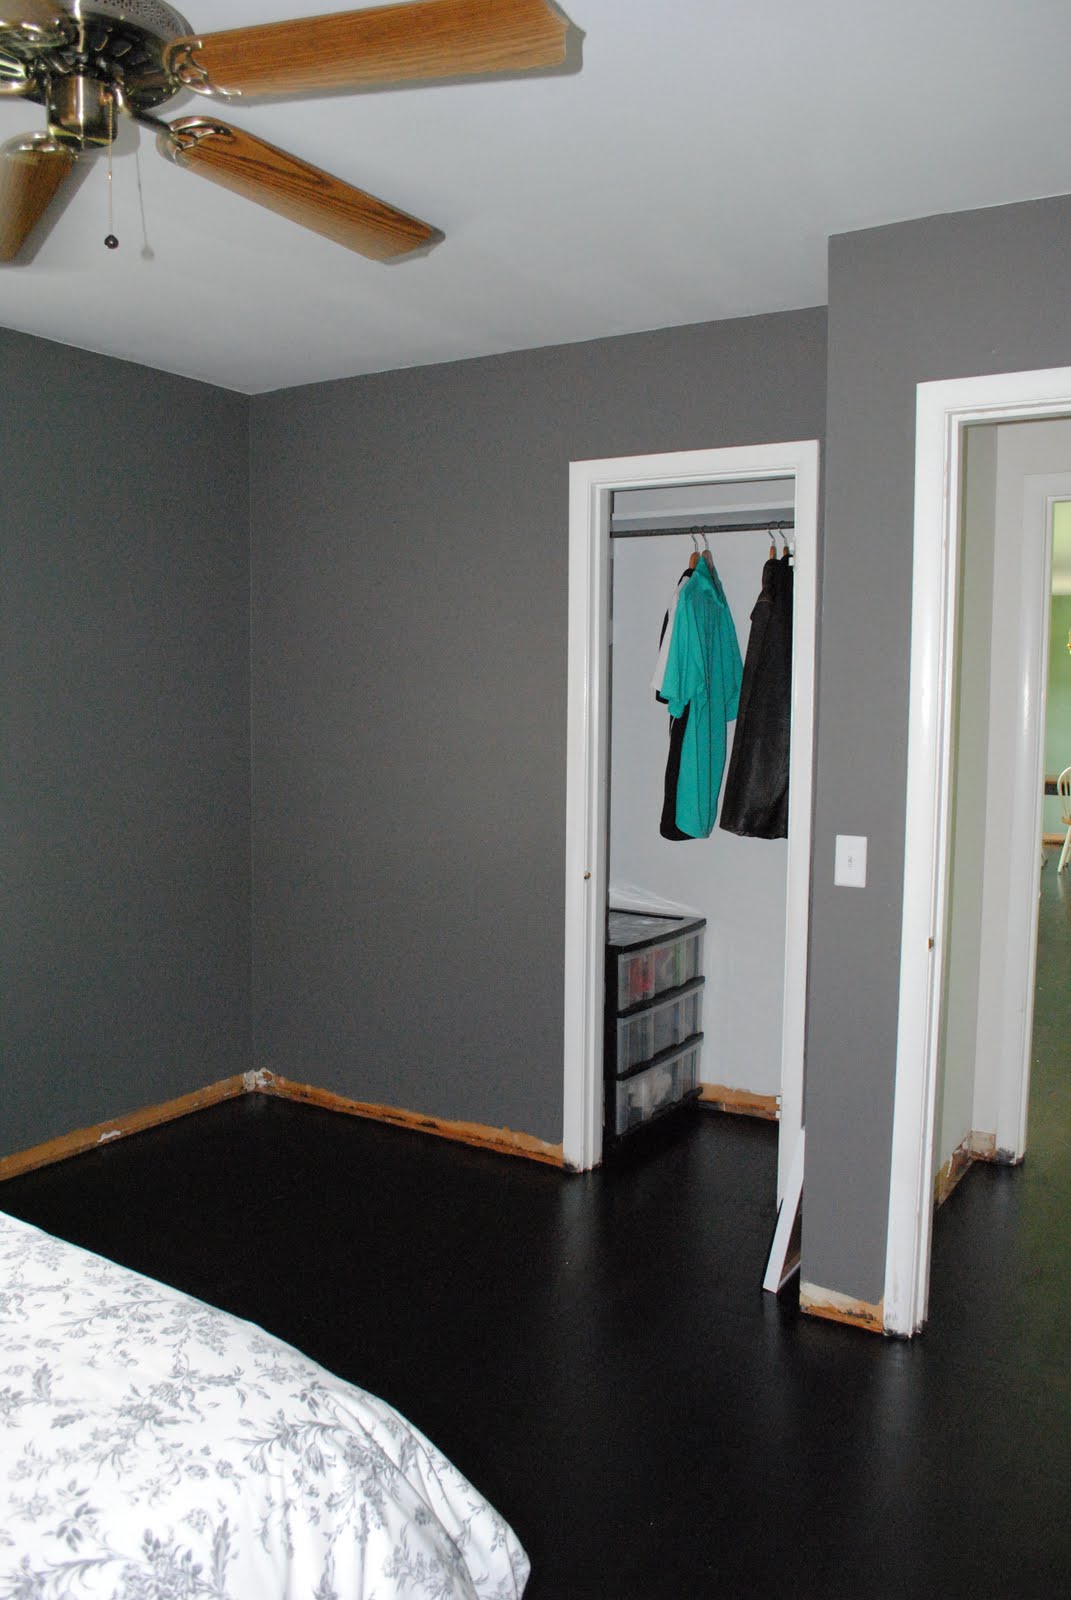
This is the bedroom we're planning to use as our Master Bedroom. Not too spacious, but just big enough!
This is one of our Guest Bedrooms. I'm not sure how well it will show in the photos, but it's painted in tone on tone pink stripes, like a Victoria's Secret shopping bag. Extra classy!
And this is Guest Bedroom number 2!
This is the very best part of the whole house tour. That's why I saved it for last! This is our Bathroom. Grey and White original tile, grey tub and sink, and awesome wallpaper! 
I hope you've enjoyed the tour!